How to fix fiber optic patch cord?
2025-09-29
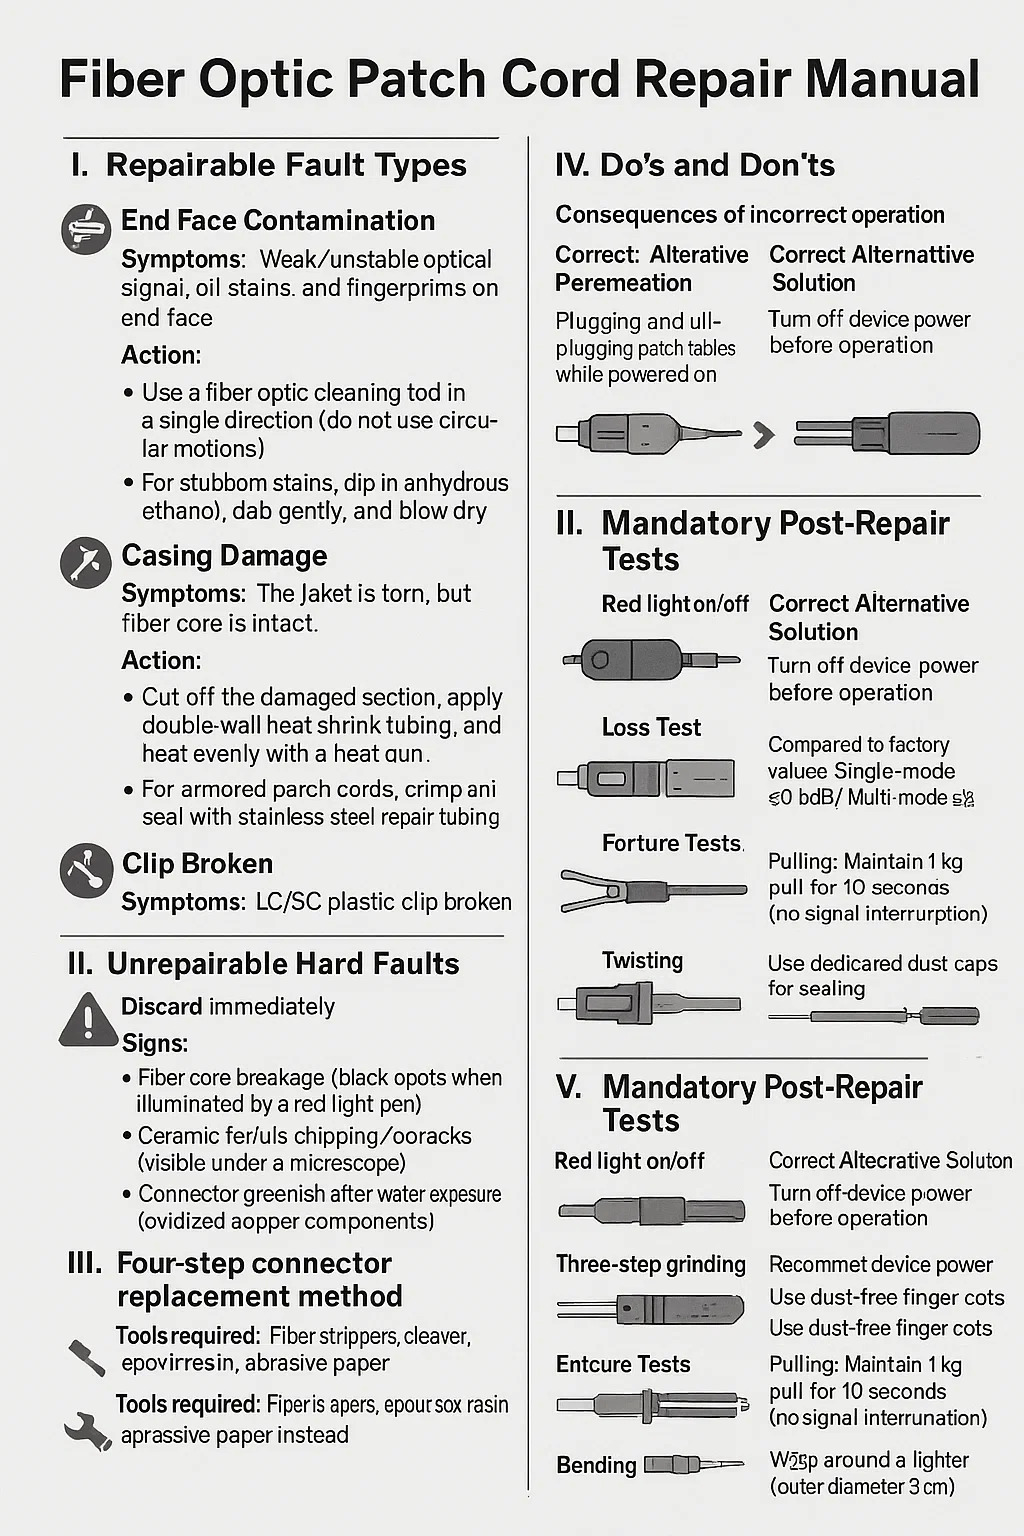
Fiber Optic Patch Cord Repair Manual
I. Repairable Fault Types
End Face Contamination
Symptoms: Weak/unstable optical signal, oil stains, and fingerprints on the end face
Action:
Use a fiber optic cleaning rod in a single direction (do not use circular motions).
For stubborn stains, dip in anhydrous ethanol, dab gently, and blow dry.
Contraindications: Do not use cotton swabs or paper towels (fiber residue is a concern).
Casing Damage
Symptoms: The jacket is torn, but the fiber core is intact.
Action:
Cut off the damaged section, apply double-wall heat shrink tubing, and heat evenly with a heat gun.
For armored patch cords, crimp and seal with stainless steel repair tubing.
Clip Broken
Symptoms: The LC/SC plastic clip is broken.
Action: Replace with a metal-shelled connector of the same model (re-termination is required).
II. Unrepairable Hard Faults
Discard immediately. Signs:
Fiber core breakage (black spots when illuminated by a red light pen)
Ceramic ferrule chipping/cracks (visible under a microscope)
Connector greenish after water exposure (oxidized copper components)
One fiber in an MPO patch cord is defective
III. Four-step connector replacement method
Tools required: Fiber strippers, cleaver, epoxy resin, abrasive paper
Fiber end removal: Cut off the damaged end, leaving at least 15cm of excess fiber. Strip off 3cm of outer jacket and clean the fiber core with an alcohol wipe. Thread a new connector. Insert the bare fiber into a new LC/SC ceramic sleeve. Inject blue epoxy resin and cure for 30 minutes. Precision cutting: Use a fiber cleaver to vertically remove the excess fiber core. The cross-section should protrude ≤0.5mm from the sleeve. End face polishing
Three-step grinding:
Coarse grinding (draw an "8" shape 10 times with 12μm sandpaper)
Fine grinding (draw an "8" shape 20 times with 3μm sandpaper)
Microscopic examination (no scratches under a 200x microscope)
IV. Do's and Don'ts
| Wrong Operation | Consequence | Correct Alternative | Critical Level |
|---|---|---|---|
| Hot-plugging without verification | Burns optical module circuits | Power off equipment & verify shutdown | (Fatal) |
| Touching ferrules with bare fingers | Skin oils corrode anti-reflective coating | Wear lint-free gloves or use vacuum tweezers | (Severe) |
| Using adhesive tape on connectors | Adhesive seeps into optical path blocking light | Install OEM dust caps immediately | (High) |
| Stripping fiber with scissors | Glass shards embed in skin/eyes | Use precision fiber strippers (e.g., Miller) | (Severe) |
V. Mandatory Post-Repair Tests
Red light on/off. Acceptable if no dark spots are present throughout the entire section (especially at bends).
Loss Test
Compared to factory values: Single-mode ≤0.5dB / Multi-mode ≤0.8dB.
Torture Tests
Pulling: Maintain a 1kg pull for 10 seconds (no signal interruption).
Twisting: Twist both ends 180° (loss fluctuation <0.3dB).
Bending: Wrap around a lighter (outer diameter 3cm) three times.


Are you ready to
cooperate with PUXIN?
cooperate with PUXIN?
Contact us to find out how our products can transform your business and
take it to the next level.
Ningbo Puxin Electronic Technology Co., Ltd. is a professional supplier of electrical engineering and integrated wiring product research and development and manufacturing.
Quick Links
Products
Keep In Touch
-

No.43 of Xiaotuanpu Road, Guanhaiwei Town, Cixi Ningbo City, Zhejiang, China
-

-

8615924366333
-

Mobile web